Here are some answers to often asked support queries.
Here is the information you need to setup your email if you host with Register365
Incoming mail settings
To collect your mail, you will need to enter the following details into your email program.
POP3 Incoming Mail Server: pop3.reg365.net (or pop3.{your-domain-name} once it has resolved correctly) for a POP3 mailbox
IMAP Incoming Mail Server: imap.reg365.net for an IMAP enabled mailbox
Username: {your-domain-name}_{username} for any mailboxes you have set up
Password: the current password for the mailbox you want to connect to
You can find a list of available mailboxes in your online Register365 Control Panel, under Domain Names > Email & FTP > Users and Email Rules in the Users and mailboxes section
If you want to be able to synchronise email between devices then enable the email address for IMAP and use the IMAP incoming mail server on both devices.
Outgoing mail settings
You need to have Authenticated SMTP service turned on for you account. Once you have that then you set the password for SMTP (please note this affects all your mailbox accounts)
SMTP Outgoing Server: server: smtp.reg365.net
username: {your-domain-name}
password: {your chosen password}
Register365 does not come with Authenticated SMTP as standard so if you don’t have an SMTP password then contact me and I can set that up.
If you need help configuring your email software for Register365 then this article may help.
If you email is with Blacknight then these are the settings you need:
Incoming Server:
IMAP: imap5r.cp.blacknight.com (or mail.blacknight.com)
POP3: pop33r.cp.blacknight.com (or mail.blacknight.com)
SMTP Outgoing Server: smtp1r.cp.blacknight.com (or mail.blacknight.com
username: your email address
password: your chosen password
For Blacknight e-mail accounts the username is the full e-mail address, the password is whatever was set up on the account when the mailbox was created and can be checked through ‘cp.blacknight.com‘.
Please make sure that SMTP authentication is enabled in the mail client as well. More details on how to switch SMTP authentication on can be found here
Setting up your Blacknight email in Outlook
Click here for more information
Setting up your Blacknight email on your iphone
Click here for more information
Setting up your Blacknight email on your Android device
Click here for more information
Checking your email through Webmail
This is a useful way to check your email without having to setup email software on your computer. You can access webmail for your blacknight email account with just your email address and password at the following address: https://altmail.blacknight.com/
Here is a good tutorial on how to setup an email on your android smartphone or tablet. Just substitute the relevant email settings:
Setting up email on android >>
Here is a good tutorial on how to setup an email on your iphone. Just substitute the relevant email settings:
If you have your email hosted with either Blacknight or Register365 you will be able to check your email on any browser as long as you know your password:
Blacknight
Go to https://altmail.blacknight.com
Register365
Go to http://yourdomain.com/webmail (replace yourdomain.com with your own domain name). Or if that doesn’t work then go to http://webmail4.register365.com/
Mail2Web
If none of the above work for you then you could try this 3rd party webmail checker. http://mail2web.com/
When you are unable to check your email for a period of time, for example when you are on holiday or at a conference it is a good idea to let people know. This can be done in the form of an auto responder or out of office email which is an automatic email that is setup in your email control panel.
Here are a few ways to do it, depending on the hosting you use:
 Setting up an autoresponder with Register365:
You will need your email username and password for this. Login to your email control panel (this can be found at http://your-domain/controlpanel – replace your-domain with your actual domain name).
Then choose email settings then autoresponder
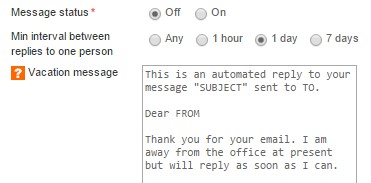
You can then enter your autoreponder details
An autoresponder should include alternative contact information and information on when you will deal with their email
Setting up an autoresponder with Blacknight
Log into cp.blacknight.com using the email address and the password for your email address
Click on Autoresponder on the left hand side of the screen
Now click Add New Autoresponder
Remember to turn off your auto responder when you get back into the office.
Here are the details for configuring your Register365 email in your email software.
Configure your email software for a POP3 account
- Setup a POP3 account in Outlook 2003
- Setup a POP3 account in Outlook Express
- How to setup a POP3 account in Thunderbird
- Setup a POP3 account in Windows Mail
- Setup a POP3 account in Outlook 2007
- Setup a POP3 account in Mail for Mac
- Setup a POP3 account in Entourage
- Setup a POP3 account in Mozilla Thunderbird for Mac
- How to set up a POP3 account in Windows Mail 2011
- How to set up a POP3 account in Microsoft Outlook 2010
- How to set up a POP3 account in Mozilla Thunderbird
- How to set up a POP3 account in Mac Mail
- How to set up a POP3 account Outlook Express
- How to setup a POP3 account in Outlook 2007
- How to setup a POP3 account on iPhone/iPad/iPhone5
- How to set up an POP account on an Android device
- How to setup a POP3 account in Outlook 2013
Configure your email software for an IMAP account
- How to setup an IMAP account in Outlook 2007
- How to setup an IMAP account in Outlook 2010
- How to setup an IMAP account in Outlook 2013
- How to setup an IMAP account in Windows Mail 2011
- How to setup an IMAP account in Mac Mail
- How to setup an IMAP account in Outlook Express
- How to setup an IMAP account on iPhone/iPad
Check your email via Register365 webmail
Use this link for Register365’s webmail or
Email Control Panel
Use this link for your email control panel
If you need your email settings then this article may help.
There are a number of solutions for sending people large files and email is not one of the best as it is not really a file sharing system.
See this article for reasons why sending large attachment by email doesn’t work
Here are some alternate ways of sending large file attachments
- Dropbox – Share files across machines, with friends and publicly for free Dropbox is a utility that allows you to instantly share files between machines, and even with other users elsewhere on the internet. Up to 2GB is free.
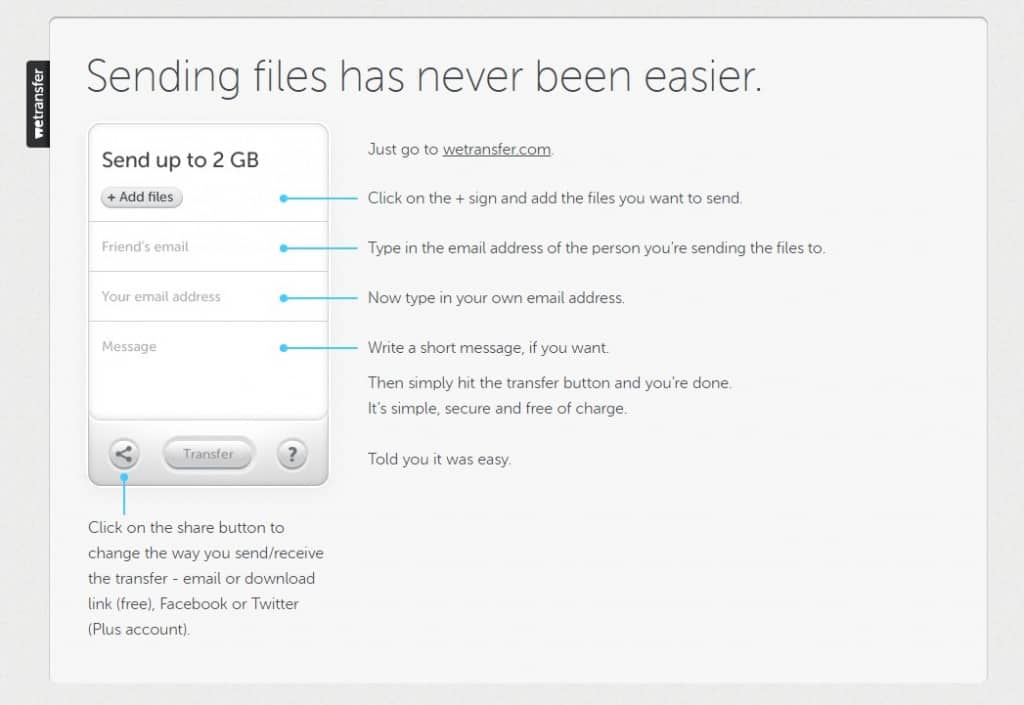
- WeTransfer – an online file-transferring platform where you give them your intended email recipient and your email, upload the file and the rest is history. This is my preferred solution and something I use a lot as it makes it so easy for the person receiving the file.
Sometimes you may be asked to provide the internet headers or email message headers to your email hosts so that support can troubleshoot any problems.
Email message headers provide a list of technical details about the message, such as who sent it, what software was used, and the route it took. This information can provide valuable details on tracking an email source and how to it got to you, or why it never arrived at its intended source.
Here are details on how to get that information from different email software
Your email client program will usually hide the full header or display only lines, such as From, To, Date, and Subject, see below for more information on pulling headers for your email client:
- Outlook 2003
- Outlook 2007
- Outlook 2010
- Outlook Express
- Outlook 97
- Outlook 98
- Outlook 2000
- Outlook 2002
- Microsoft Exchange
- Zimbra
- Entourage
- Mac OS X Mail
- Outlook Express for Macintosh
- Gmail (works for Google Apps as well)
- Yahoo!
- AOL
- Hotmail
- Eudora
- Netscape, Mozilla or Thunderbird
- Lotus Notes
- Pine
- XtraMail
- Pegasus Mail
- Claris Emailer
- Mail Warrior
- Juno
- Novell Groupwise
- Thunderbird
If you want you can then analyze the header information using this tool from MXToolbox
If you don’t see an answer to your query then please Raise a Support Enquiry and I can help you
